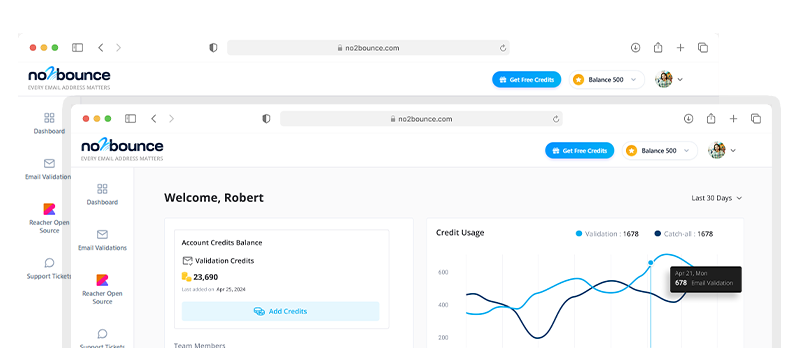
No2Bounce is anemail validation service used to identify undeliverable and risky emailaddresses before they are used for outbound campaigns. The Pipedriveintegration allows records to be imported directly from Pipedrive (Persons,Organizations, Deals, and Activities), validated within No2Bounce, and theresults exported for further use.
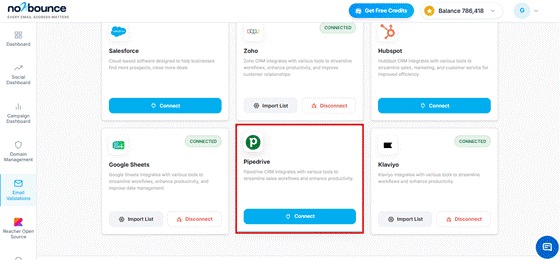
The integrationis accessed from the Email Validations section of the No2Bounce dashboard,alongside other supported CRM and marketing platforms such as Salesforce, Zoho,HubSpot, Google Sheets, and Klaviyo.
Prerequisites
- An active No2Bounce account with access to the EmailValidations module.
- An active Pipedrive account with permissions to installand authorize apps.
- Sufficient No2Bounce validation credits to cover thenumber of records to be validated.
Step 1: Locate the Pipedrive Integration Card
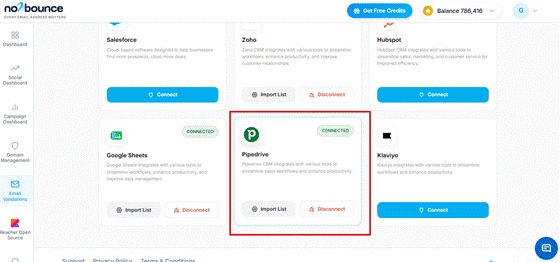
In theNo2Bounce dashboard, open the “Email Validations” section from the left-handnavigation menu. This displays the available CRM and marketing platformintegrations, including Salesforce, Zoho, HubSpot, Google Sheets, Pipedrive,and Klaviyo. Locate the Pipedrive card and click the “Connect” button.
Step 2: Authorize No2Bounce Access in Pipedrive
Clicking “Connect” redirects to Pipedrive’s app authorization screen, showing the company and user the app will be added to. The screen lists the full set of permissions No2Bounce is requesting, including full access to Deals, Mail, Activities, Contacts, Products, Leads, Goals, Projects, Webhooks, and related field types, as well as phone call and messenger integration access. Review the requested permissions and scroll to the bottom of the page.
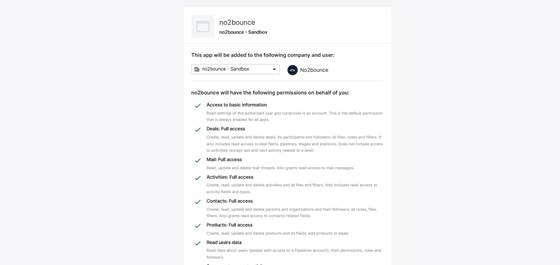
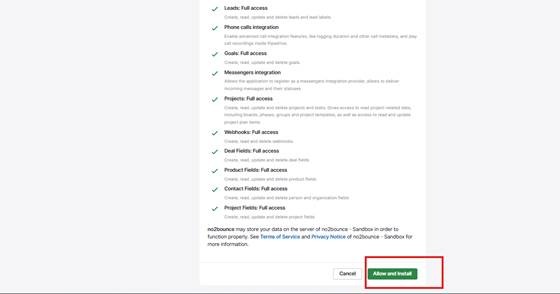
Click “Allow and Install” to complete the authorization and install the No2Bounce app in Pipedrive.
Step 3: Confirm the Connection
After authorization, the Pipedrive card in No2Bounce updates to display a “CONNECTED” status, along with “Import List” and “Disconnect” options. Click “Import List” to proceed to the Pipedrive Integration page.
Step 4: Open the Pipedrive Integration Page and Choose a Record Type
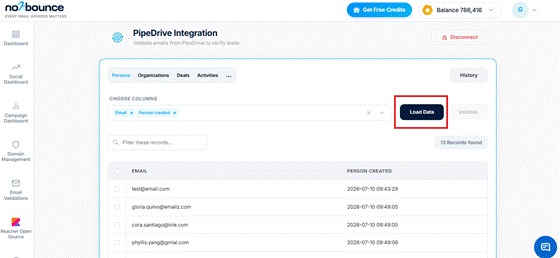
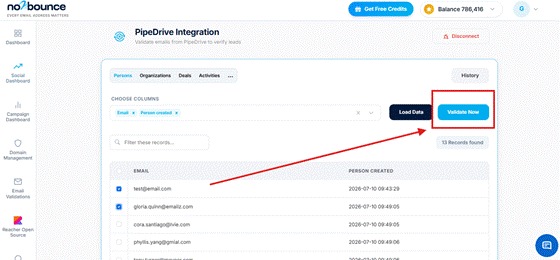
The Pipedrive Integration page is used to validate emails sourced from Pipedrive data. It offers tabs for the different Pipedrive record types available for import Persons, Organizations, Deals, and Activities plus a “Choose Columns” selector used to define which fields to import from the selected record type (Persons is used in this example).
Step 5: Select Columns and Load Data
Choose the fields to import for example, Email and Person created from the “Choose Columns” selector, then click “Load Data” to fetch the matching records from Pipedrive into No2Bounce for preview. A filter field is available to search within the loaded records, and the total number of matching records is shown (13 records in this example).
Step 6: Select Records and Validate
Select the checkboxes next to the records to validate, then click “Validate Now” to open the “Validation Preferences” dialog.
Step 7: Set Validation Preferences and Start Validation
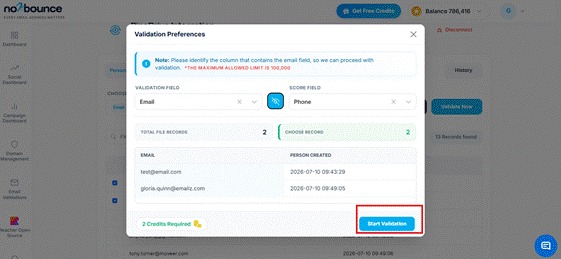
In the Validation Preferences dialog:
- Validation Field – choose the column containing the email address (e.g., Email).
- Score Field – optionally choose a secondary reference column (e.g., Phone).
- Review the Total File Records and Choose Record counts, and the number of credits required.
Click “Start Validation” to begin processing.
Step 8: Review Validation Results
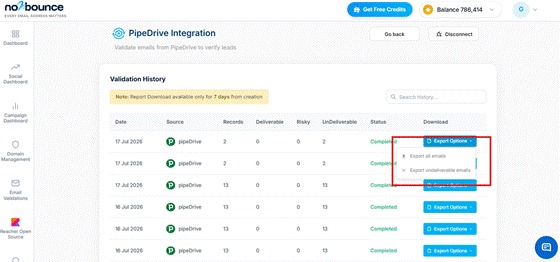
No2Bounce processes the selected records and classifies each email as Deliverable, Risky, or Undeliverable. Every validation run is logged in the Validation History table, showing the date, source (pipeDrive), record count, result breakdown, and status.
Step 9: Export the Results
From the Validation History table, use the “Export Options” dropdown next to a completed run to export the results. The available export options depend on the result breakdown of that run — for example, “Export all emails” and “Export undeliverable emails” are shown when a run contains no deliverable records; a “Export deliverable emails” option also appears when deliverable records are present.