Prerequisites
- An active No2Bounce account with access to Email Validations > Integrations
- A Moosend account with API access enabled
- Your Moosend API Key (Settings > API Key) and API URL (Settings > Branding > Platform custom domain)
- Sufficient credit balance: validation costs 1 credit per record
Step 1: Go to Integrations & Click Connect on Moosend
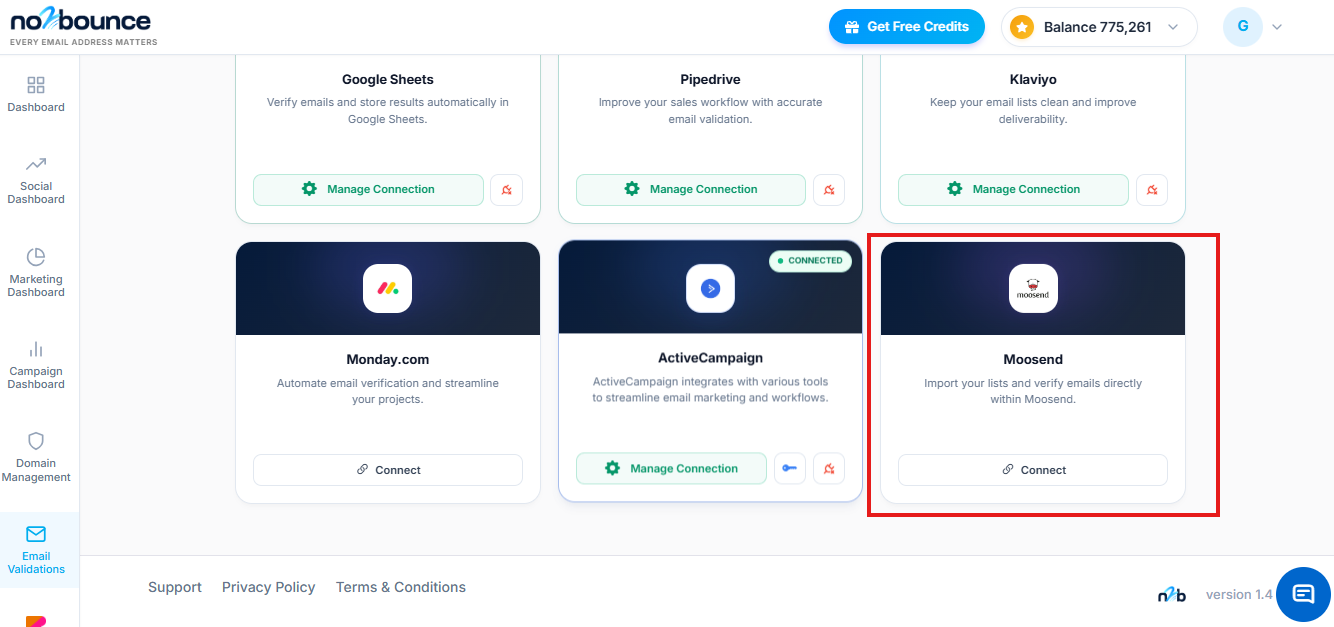
Log in to your No2Bounce account. In the left sidebar, click Email Validations, then open the Integrations tab.
You'll see other connected tools such as Google Sheets, Pipedrive, Klaviyo, and ActiveCampaign, alongside Moosend, which shows a Connect button. Click it to begin.
Step 2: Review What the Connection Enables
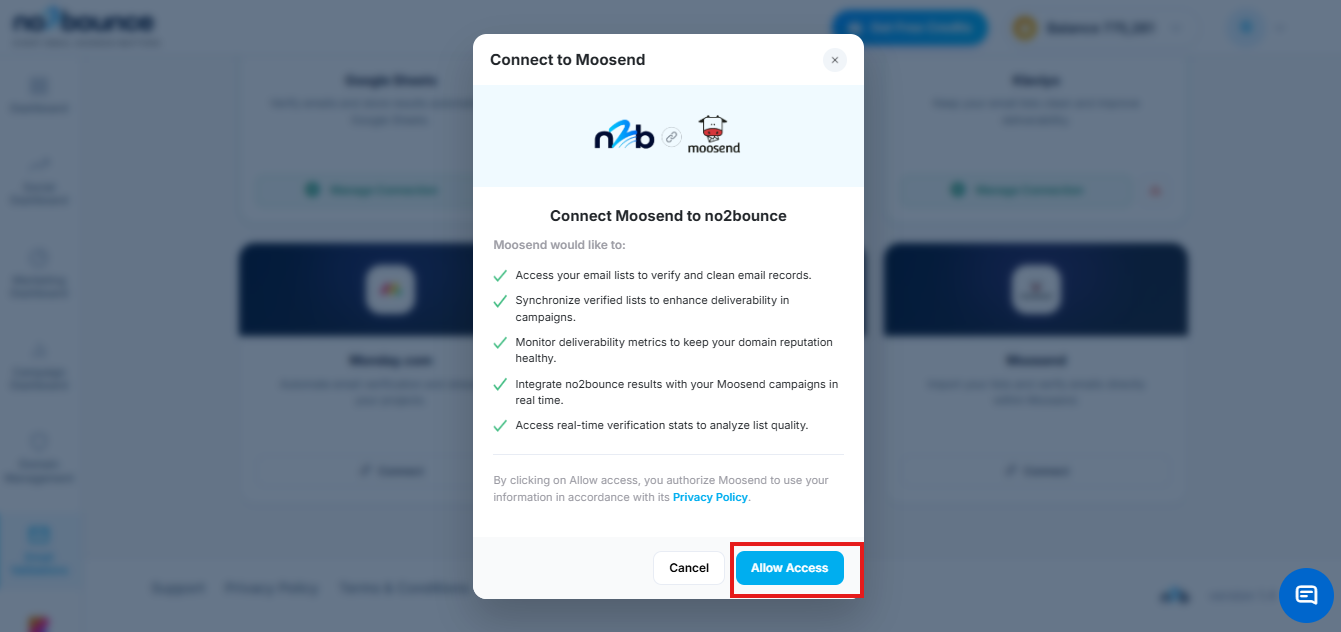
A panel opens outlining what connecting Moosend allows No2Bounce to do: access your email lists to verify and clean records, synchronize verified lists back to improve deliverability, monitor deliverability metrics, integrate validation results with your Moosend campaigns in real time, and view live verification stats.
Click Allow Access to continue.
Step 3: Enter Your API Key & API URL
Moosend connects using an API Key and API URL, with no OAuth exchange required. Find your API Key in Moosend under Settings > API Key, and your API URL under Settings > Branding > Platform custom domain. Enter both and click Next.
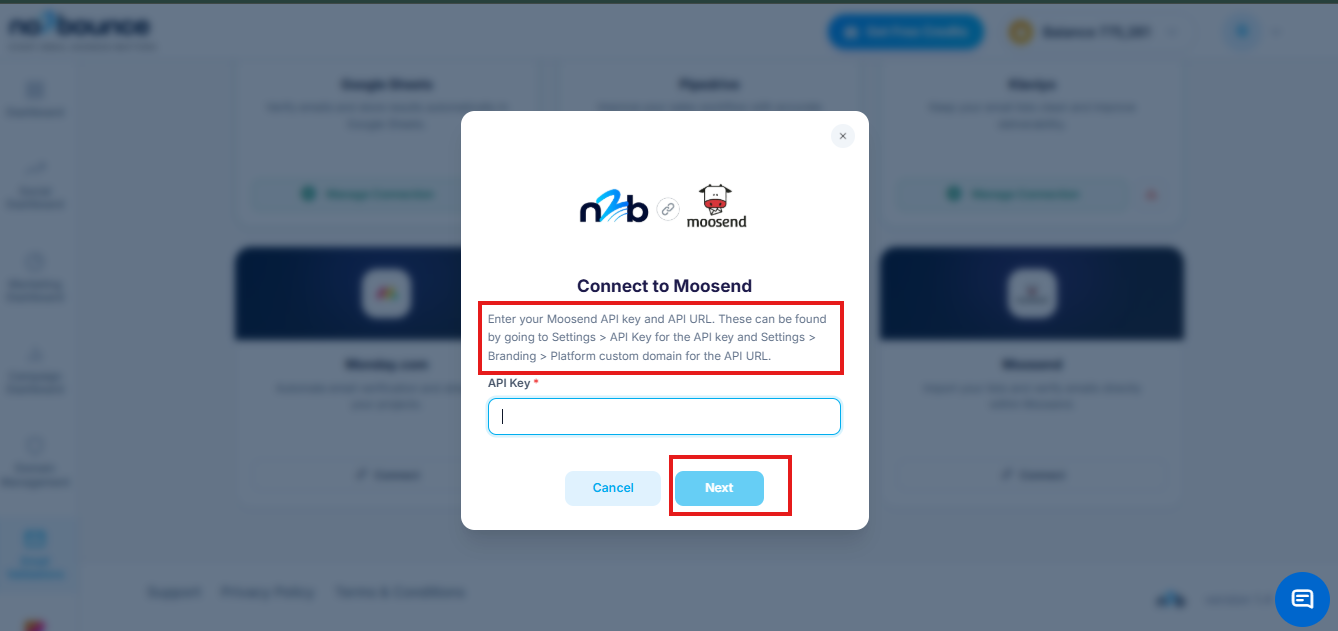
Both the API Key and API URL are required. You'll find each under a different Settings section in Moosend, so have both ready before you start.
Step 4: Moosend Is Now Connected
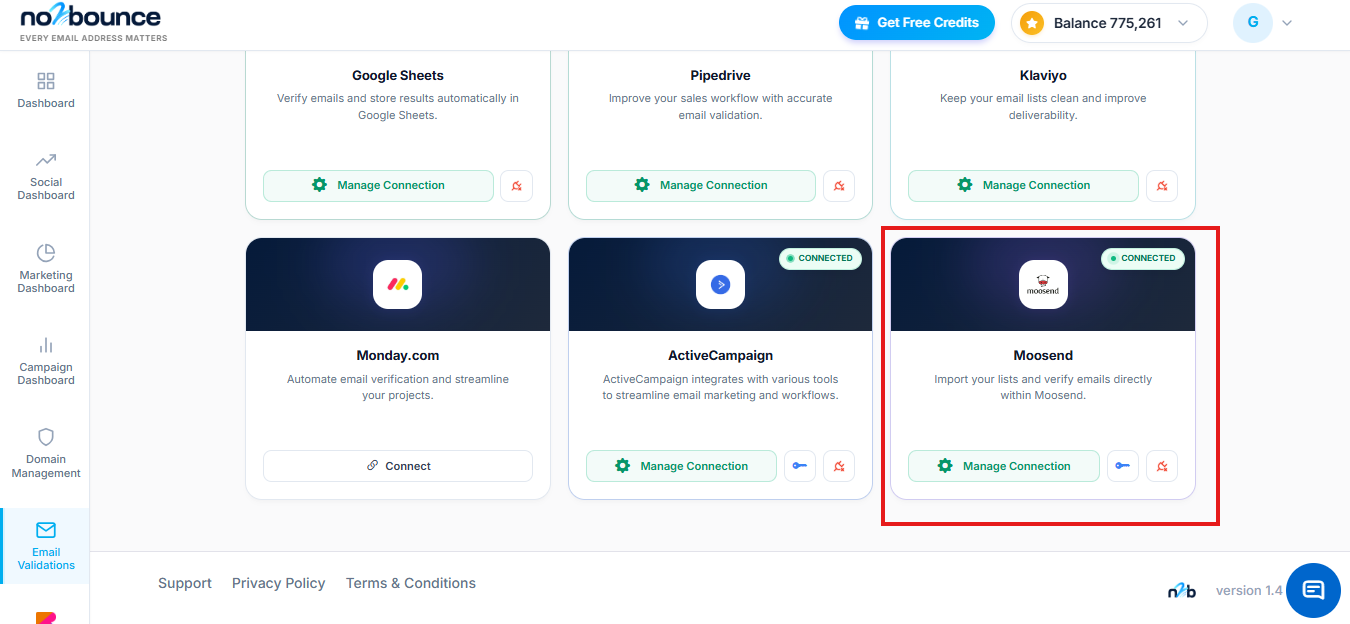
Once your credentials are accepted, you're returned to the Integrations dashboard. The Moosend card now shows a green CONNECTED badge alongside your other connected tools, and a Manage Connection option appears so you can review or disconnect it at any time.
Step 5: Select Your Mailing List & Choose Columns
On the Moosend Integration page, choose the mailing list you want to work with from the tabs at the top. Under Choose Columns, select which fields to import: Email and Name are available. A History tab sits alongside for reviewing past runs.
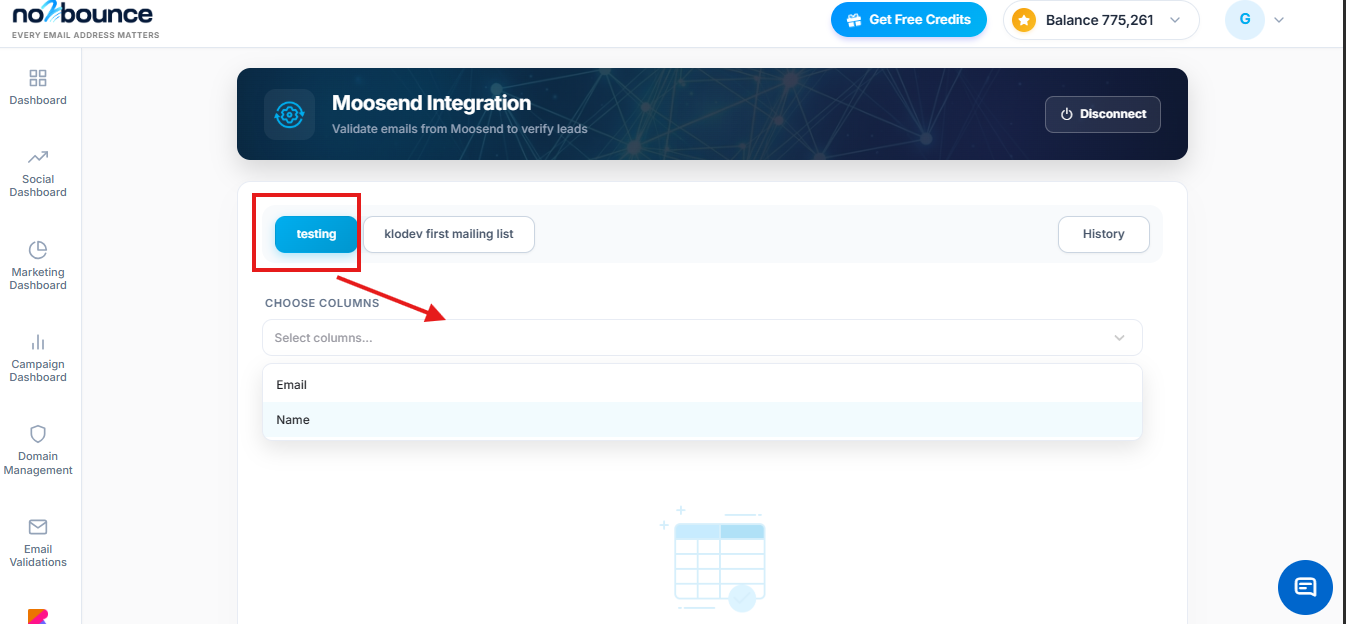
The Email column must always be selected: it is required for the validation process to run correctly.
Step 6: Load Data & Select Records
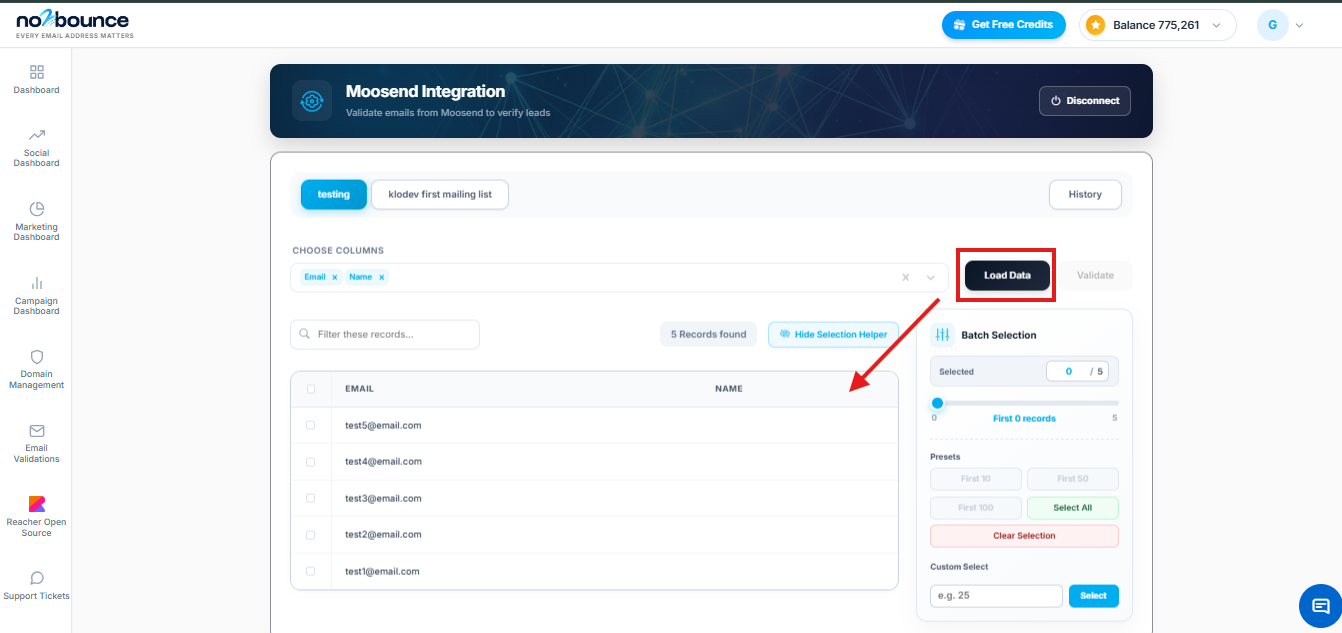
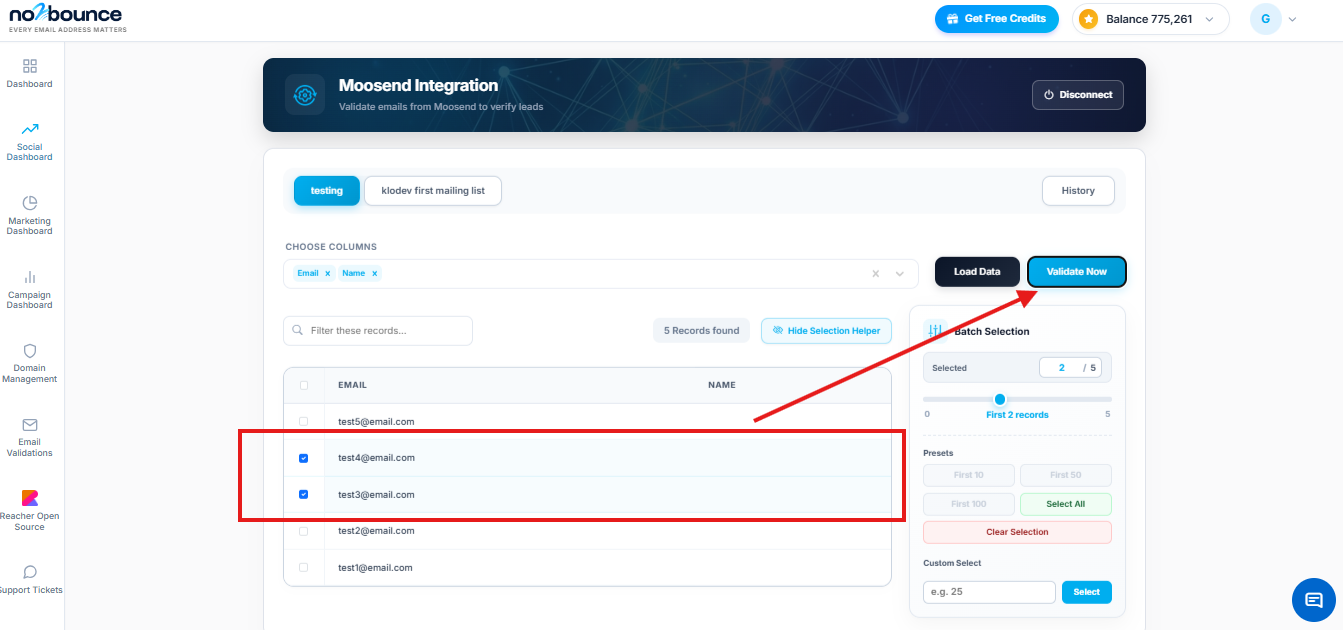
Click Load Data to pull in your list. The interface reports the number of matching records found and loads them into a table, with Select All, Clear Selection, and a batch selection helper with presets and a custom count field to choose exactly which contacts to include.
Step 7: Review Your Filtered Selection
Use the filter bar to narrow the list down, and check the running selection count as you go. Once you're happy with your selection, click Validate Now to begin.
Step 8: Set Your Validation Preferences
The Validation Preferences dialog asks you to confirm which column holds the email address (Validation Field), and lets you map an optional Score Field. It previews the records you've selected and shows how many credits the run will use before you commit.
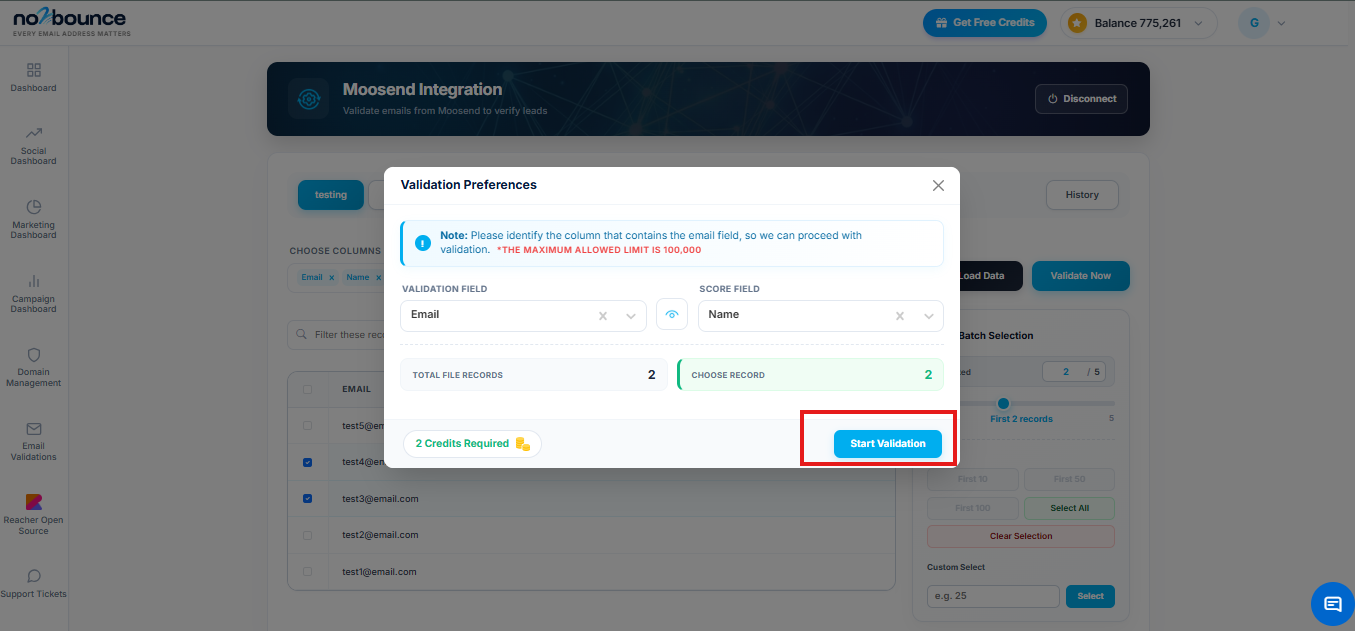
Credit usage: credits are debited based on the number of email addresses processed. Each email consumes 1 credit. Runs are capped at 100,000 records.
Step 9: Track Runs in Validation History
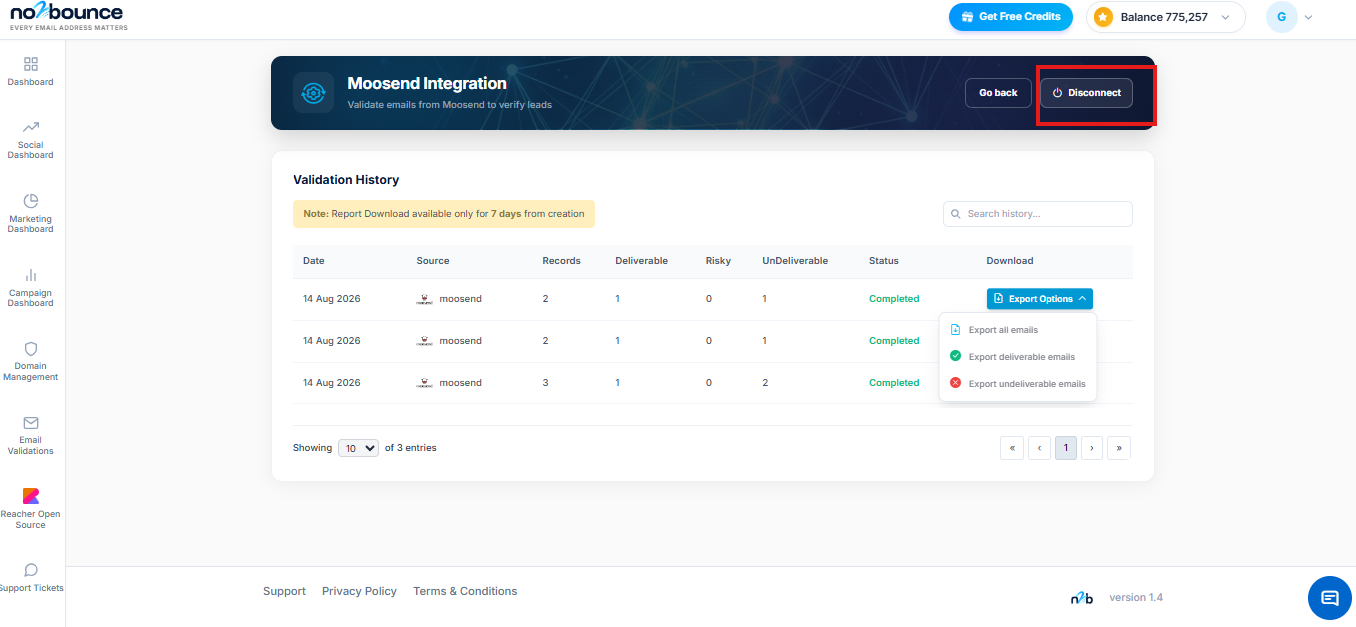
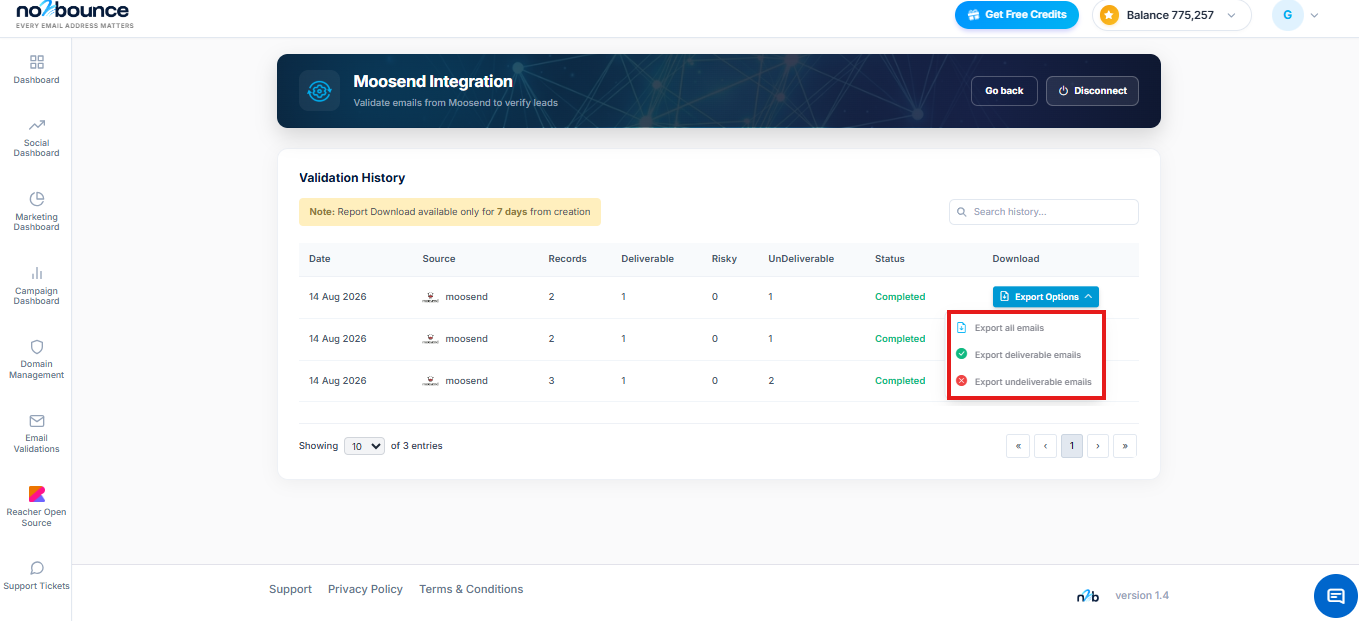
The Validation History table lists every Moosend-sourced run by date, record count, and Deliverable / Risky / Undeliverable breakdown, so you can see exactly how each batch performed at a glance.
Step 10: Review Results & Export
Each run reaches a Completed status with full Deliverable, Risky, and Undeliverable counts. Use Export Options on any row to download all emails, deliverable only, or undeliverable only. Downloads stay available for 7 days after each run.