Prerequisites
- An active No2Bounce account with access to the Email Validations module: sign up free
- An active monday.com account with permission to authorize third-party apps
- Sufficient No2Bounce validation credits to cover the number of records to be validated
Step 1: Locate the monday.com Integration Card
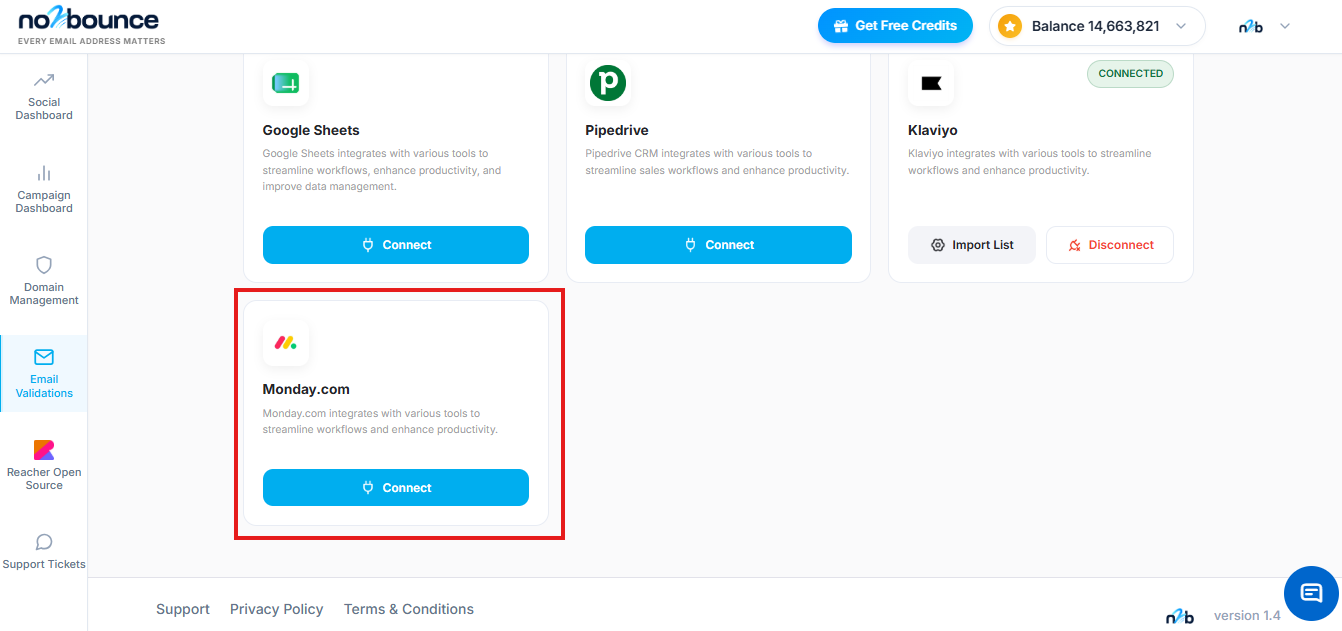
In the No2Bounce dashboard, open the Email Validations section from the left-hand navigation menu. This displays the available CRM and marketing platform integrations, including Google Sheets, Pipedrive, Klaviyo, and monday.com.
Locate the monday.com card and click the Connect button to begin the authorization flow.
Step 2: Review and Allow Access in the No2Bounce Consent Dialog
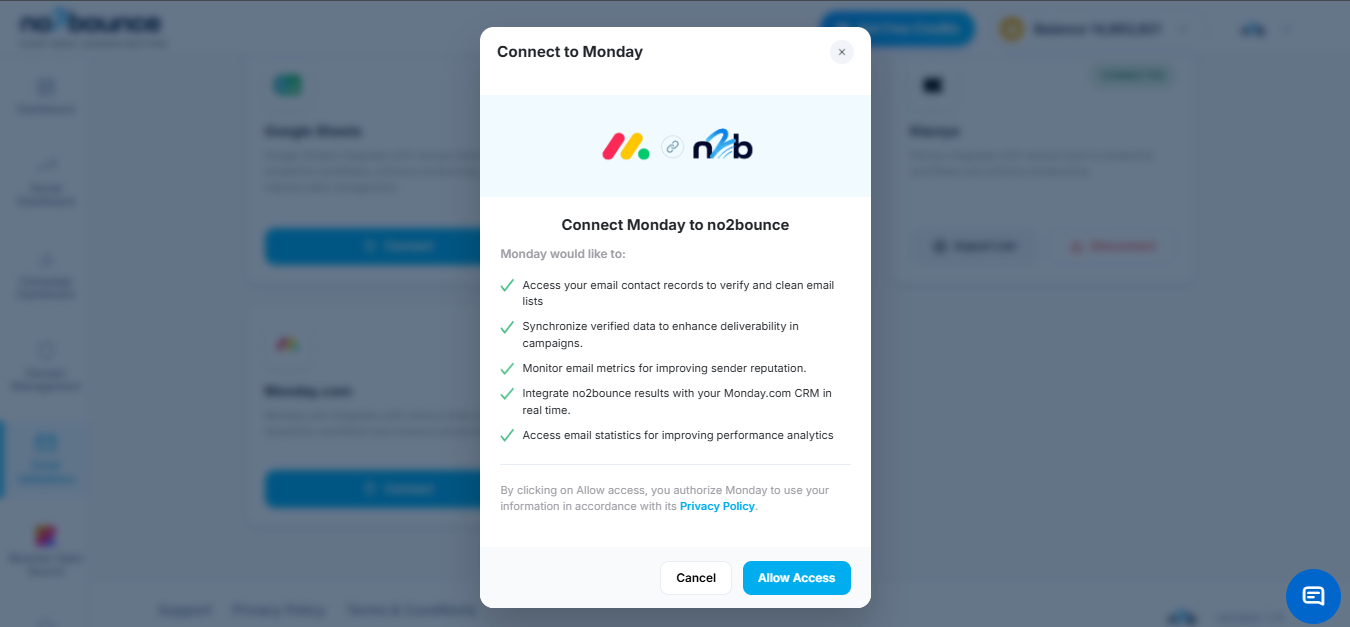
Clicking Connect opens a "Connect to Monday" dialog explaining what monday.com would like to do on your behalf: access email contact records to verify and clean email lists, synchronize verified data to enhance deliverability in campaigns, monitor email metrics to improve sender reputation, integrate No2Bounce results with your monday.com CRM in real time, and access email statistics for performance analytics.
Review the permissions and click Allow Access to continue.
Step 3: Authorize No2Bounce on monday.com
You are redirected to monday.com's own authorization screen, titled "Authorize no2bounce." This screen lists the permissions No2Bounce is requesting on monday.com, including reading your profile information, reading all of your boards' data, modifying any of your boards' data, and reading and modifying user documents, with additional permissions available under "Show 17 more permissions."
Review the permissions and click Authorize to complete the connection.
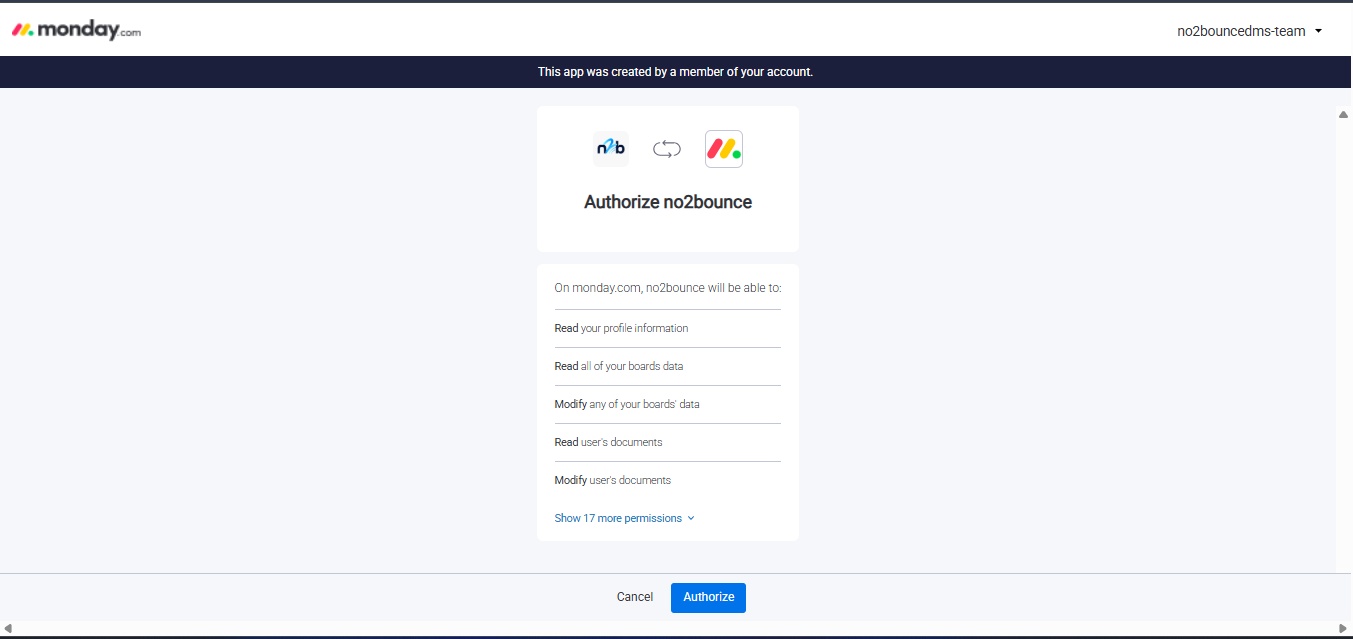
No2Bounce requests broad monday.com permissions (reading and modifying boards and documents) to support two-way sync of validation results back into your boards.
Step 4: Confirm the Connection
After authorization, the monday.com card in No2Bounce updates to display a CONNECTED status, along with Import List and Disconnect options, matching the pattern used for the other connected integrations (Klaviyo, Pipedrive, Google Sheets).
Step 5: Open the monday.com Integration Page and Select a Board
The monday.com Integration page is used to validate emails sourced from monday.com board items. Select the board containing the contact or lead data you want to validate, then use the Choose Columns selector to define which board columns to import — at minimum, the column containing email addresses.
Step 6: Load Data
Once the desired columns have been selected, click Load Data to fetch the matching items from the selected monday.com board into No2Bounce for preview. A filter field is available to search within the loaded records, and the total number of matching records is displayed.
Step 7: Select Records and Validate
Select the checkboxes next to the records to validate, then click Validate Now to open the Validation Preferences dialog.
Step 8: Set Validation Preferences and Start Validation
In the Validation Preferences dialog:
- Validation Field — choose the column containing the email address
- Score Field — optionally choose a secondary reference column (e.g., a phone or ID column)
- Review the Total File Records and Choose Record counts, and the number of credits required
Click Start Validation to begin processing.
Credit usage. Each validation run consumes No2Bounce credits based on the number of records processed. The maximum allowed record limit per validation batch is 100,000 records.
Step 9: Review Validation Results and Export
No2Bounce processes the selected records and classifies each email as Deliverable, Risky, or Undeliverable. Every validation run is logged in the Validation History table, showing the date, source (monday.com), record count, result breakdown, and status.
From this table, use the Export Options dropdown next to a completed run to export the results:
- Export all emails
- Export deliverable emails
- Export undeliverable emails
Report downloads are available only for 7 days from the date the validation was created.
Email Validation Workflow
The end-to-end workflow, once monday.com is connected, follows this sequence:
- Import List → select a board and choose columns to load
- Load Data → fetch matching items from the selected monday.com board into No2Bounce
- Select the records and set the Validation Field / Score Field
- Start Validation → No2Bounce checks each email and classifies it as Deliverable, Risky, or Undeliverable
- Review the results summary and Validation History
- Export the desired result set (all, deliverable-only, or undeliverable-only)