Overview
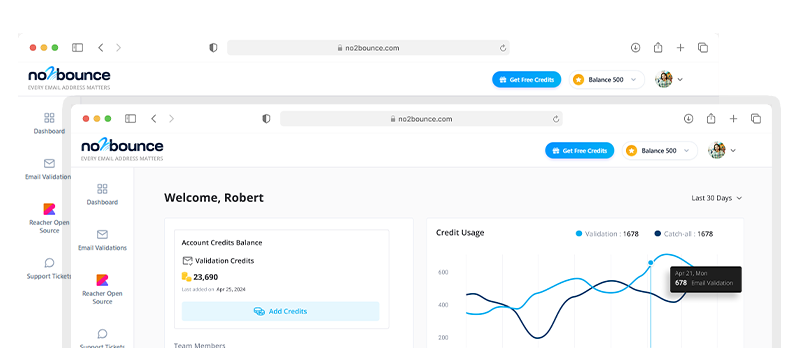
No2Bounce is an email validation service used to identify undeliverable and risky email addresses before they are used for outbound campaigns. The Klaviyo integration allows email lists to be imported directly from Klaviyo, validated within No2Bounce, and the results exported for further use.
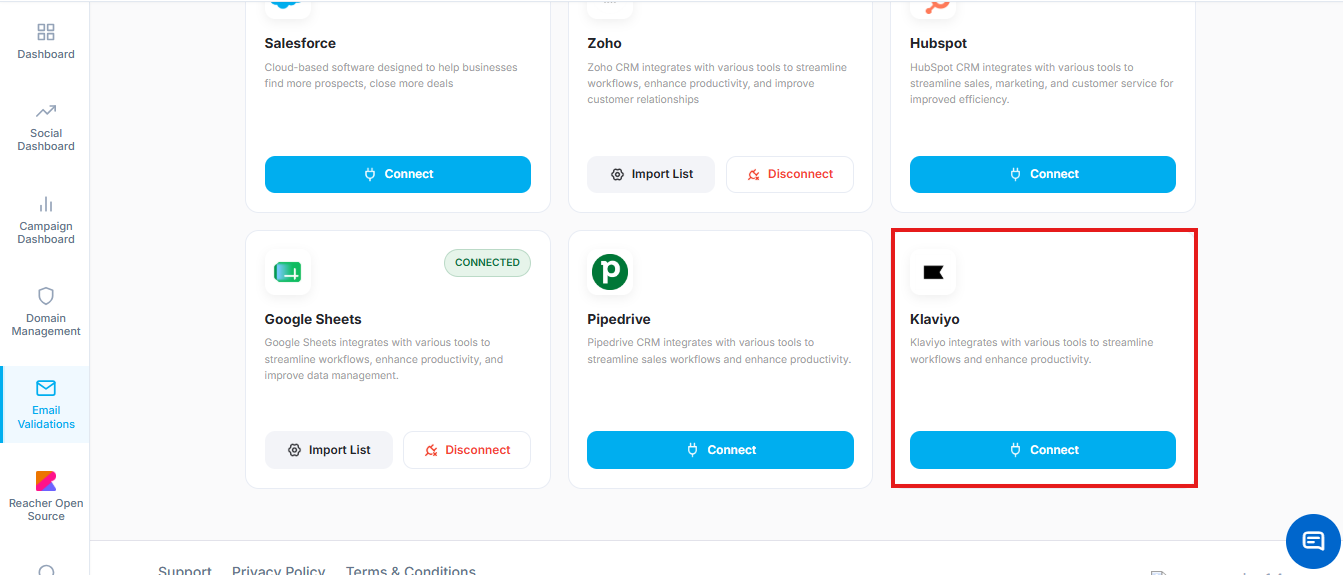
The integration is accessed from the Email Validations section of the No2Bounce dashboard, alongside other supported CRM and marketing platforms such as Salesforce, Zoho, HubSpot, Google Sheets, and Pipedrive.
Prerequisites
- An active No2Bounce account with access to the Email Validations module.
- An active Klaviyo account with administrator or integration-level permissions.
- Sufficient No2Bounce validation credits to cover the number of records to be validated.
Step-by-Step Integration Process
Step 1: Locate the Klaviyo Integration Card
In the No2Bounce dashboard, open the “Email Validations” section from the left-hand navigation menu. This displays the available CRM and marketing platform integrations, including Salesforce, Zoho, HubSpot, Google Sheets, Pipedrive, and Klaviyo. Locate the Klaviyo card and click the “Connect” button.
Step 2: Authorize No2Bounce Access in Klaviyo
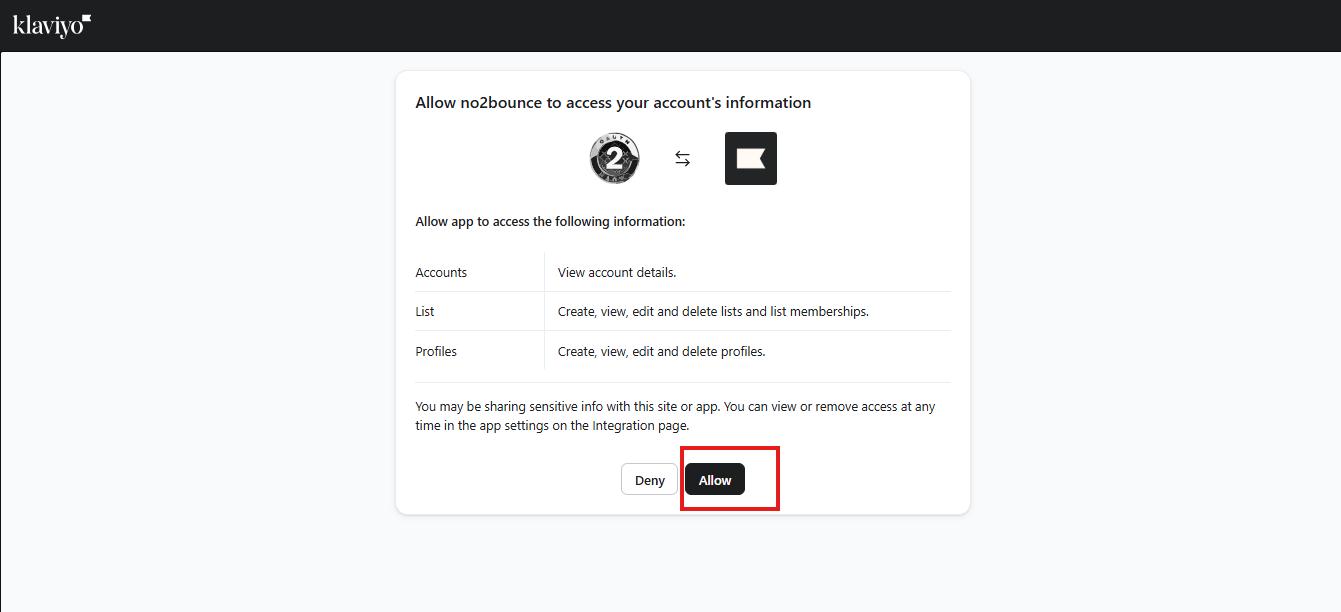
Clicking “Connect” redirects to Klaviyo’s authorization screen. This screen lists the permissions No2Bounce is requesting: viewing account details, and creating, viewing, editing, and deleting lists, list memberships, and profiles. Review the requested permissions and click “Allow” to authorize the connection.
Step 3: Confirm the Connection
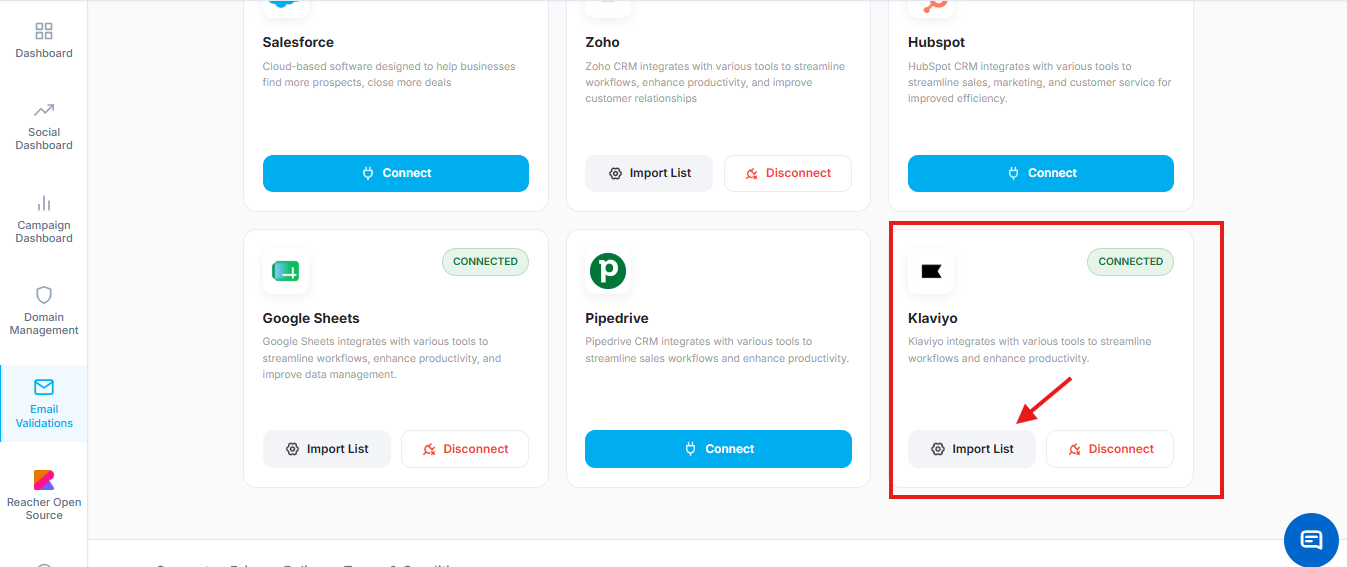
After authorization, the Klaviyo card in No2Bounce updates to display a “CONNECTED” status, along with “Import List” and “Disconnect” options. Click “Import List” to proceed to the Klaviyo Integration page.
Step 4: Open the Klaviyo Integration Page
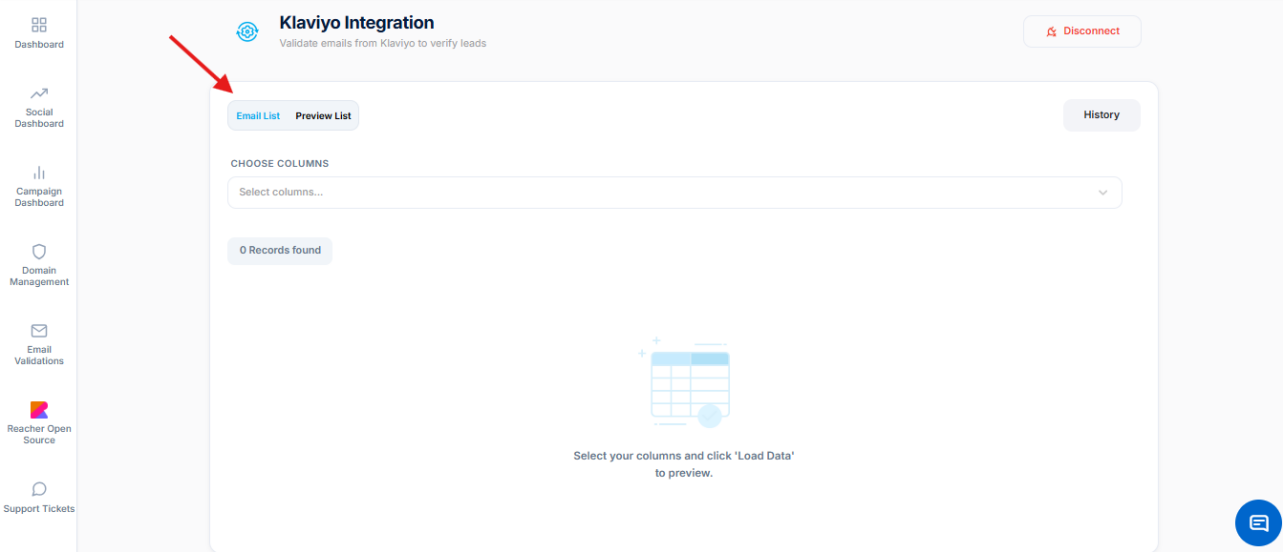
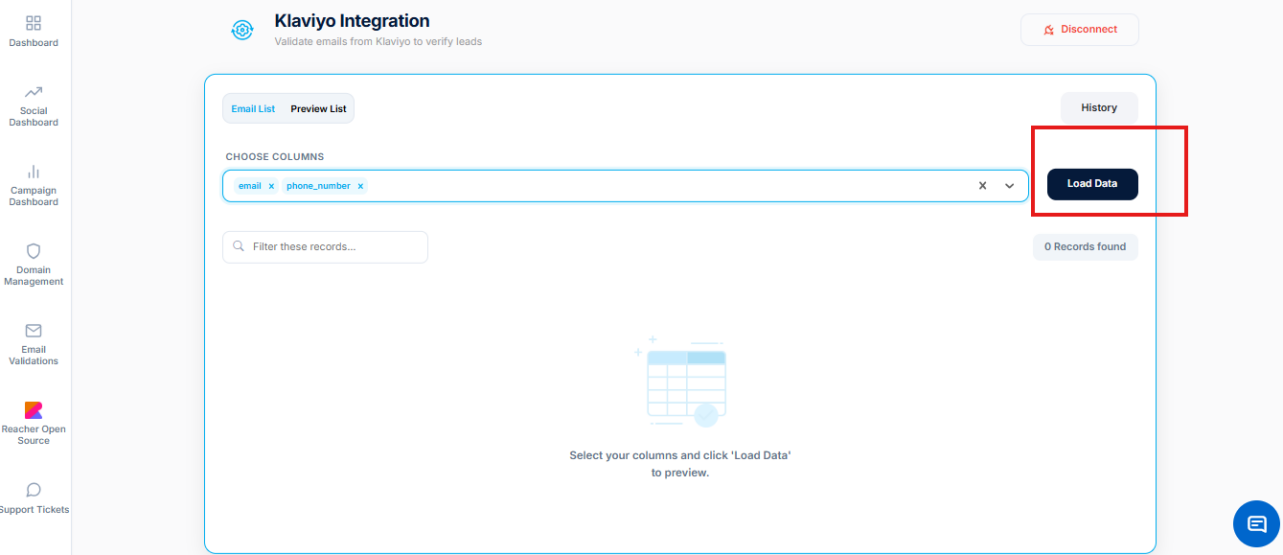
The Klaviyo Integration page is used to validate emails sourced from Klaviyo profiles. It contains an “Email List” tab and a “Preview List” tab, along with a “Choose Columns” selector used to define which Klaviyo profile fields to import.
Step 5: Select Columns to Import
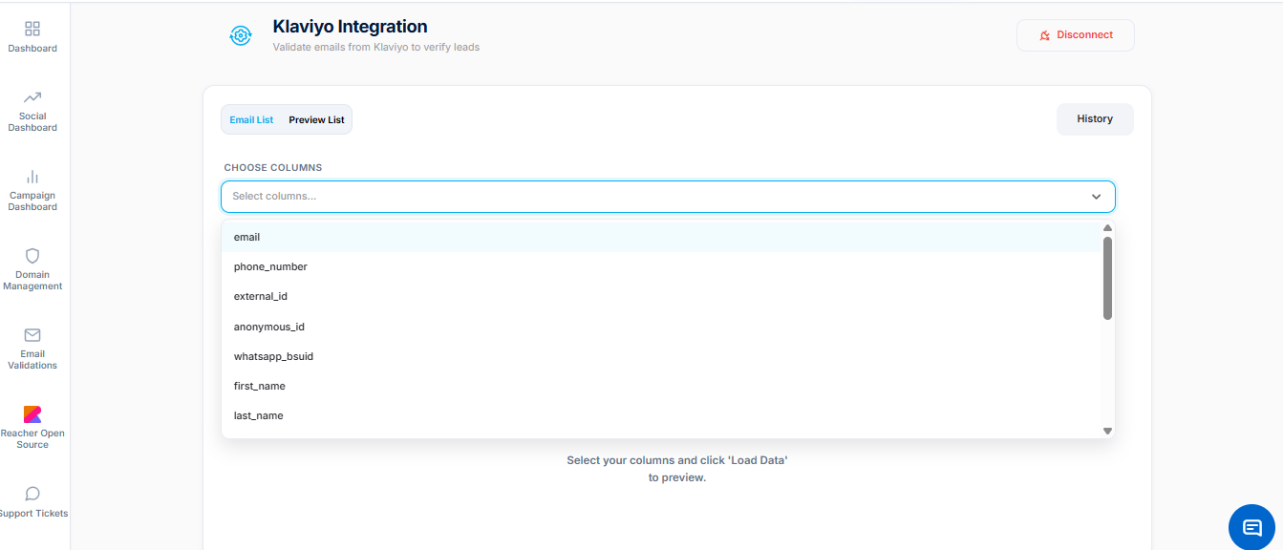
Click the “Select columns…” dropdown to choose which Klaviyo profile fields to bring into No2Bounce. Available fields include email, phone_number, external_id, anonymous_id, whatsapp_bsuid, first_name, and last_name, among others. At minimum, the email field should be selected, since this is the field validated by No2Bounce.
Step 6: Load Data From Klaviyo
Once the desired columns (for example, email and phone_number) have been selected, click “Load Data” to fetch the corresponding records from Klaviyo into No2Bounce for preview. A filter field is also available to search within the loaded records.
Step 7: Set Validation Preferences and Start Validation
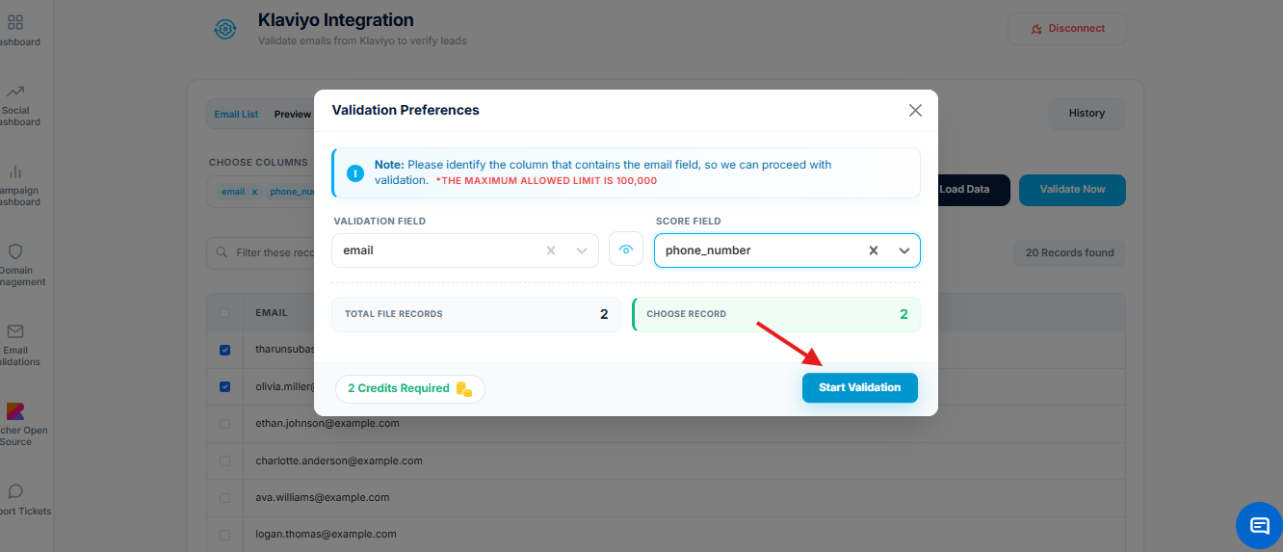
After the data loads, select the records to validate and click “Validate Now” to open the “Validation Preferences” dialog. In this dialog:
- Validation Field – choose the column containing the email address (e.g., email).
- Score Field – optionally choose a secondary reference column (e.g., phone_number).
- Review the Total File Records and Choose Record counts, and the number of credits required.
Click “Start Validation” to begin processing.
Step 8: Review Validation Results
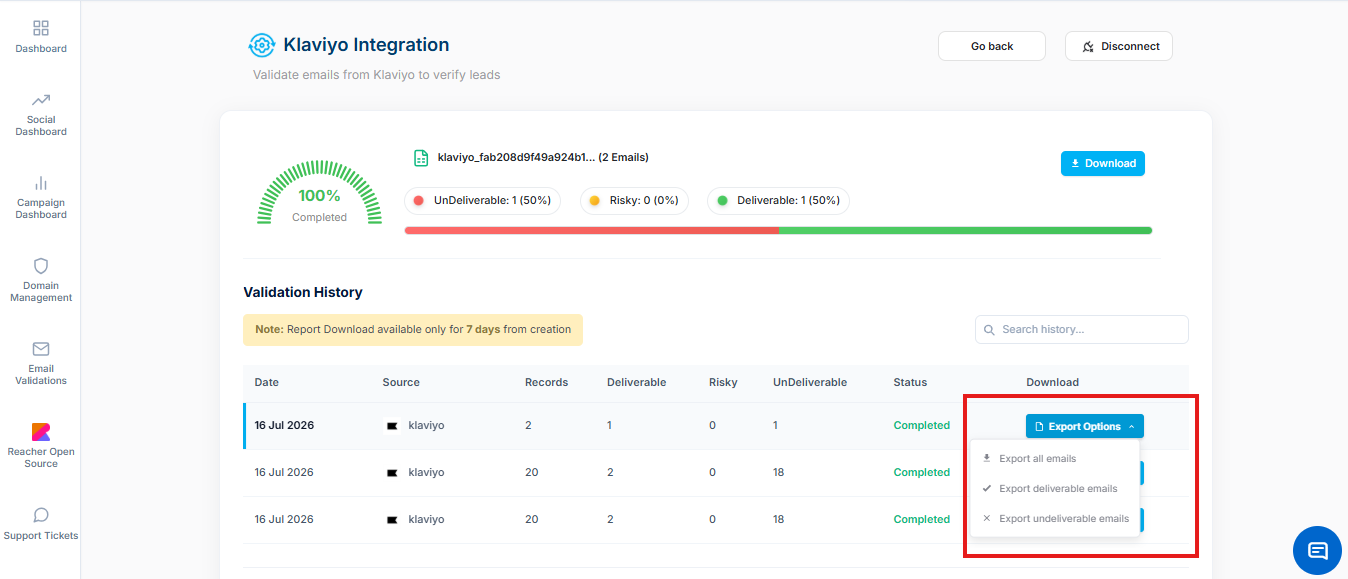
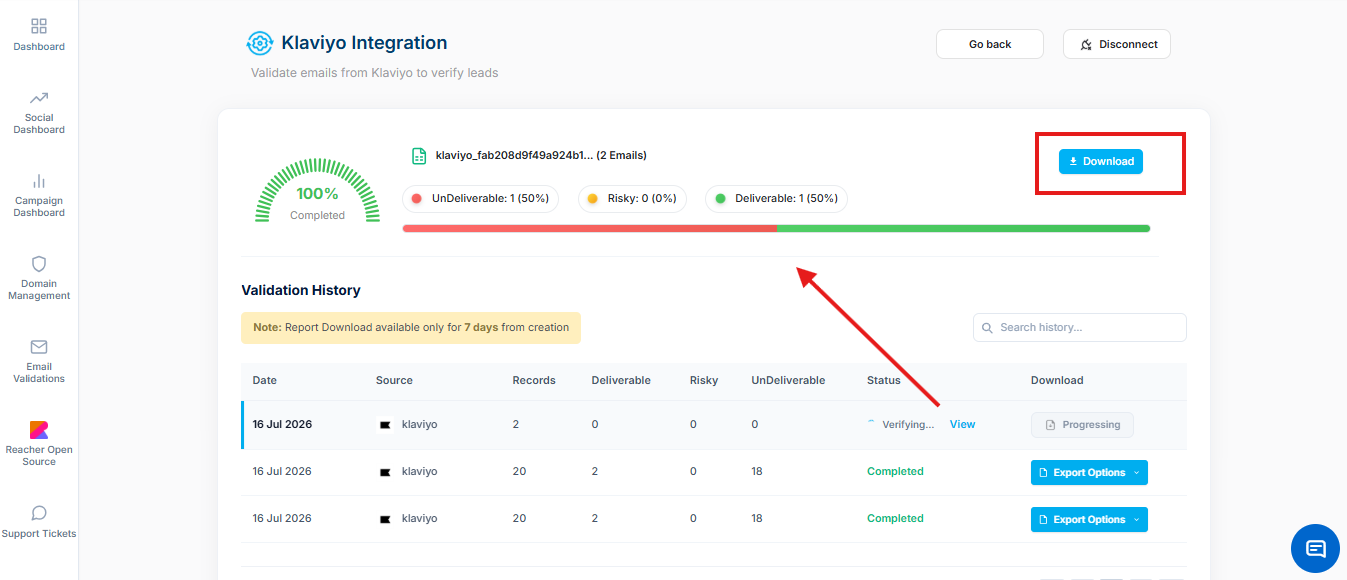
No2Bounce processes the selected records and displays a completion percentage along with a breakdown of results into Undeliverable, Risky, and Deliverable categories. Each validation run is also logged in the Validation History table below, showing the date, source (Klaviyo), record count, result breakdown, and status.
Step 9: Export the Results
From the Validation History table, use the “Export Options” dropdown next to a completed run to export the results. Three export options are available: Export all emails, Export deliverable emails, and Export undeliverable emails.