Overview
no2bounce is an email validation service that identifies undeliverable and risky addresses before they are used in outbound campaigns. The ActiveCampaign integration lets you pull contacts directly out of ActiveCampaign, validate them inside no2bounce, and export the results for use elsewhere.
Authentication uses an account-scoped API Key and API URL against the ActiveCampaign REST API, so no OAuth authorisation screen is involved. Once connected, you select which contact fields to import, preview the records, and run them through validation. Results appear live as the run processes.
Prerequisites
Before you begin, make sure you have the following in place:
- An active no2bounce account with access to the Email Validations module
- An ActiveCampaign account with API access enabled
- Your ActiveCampaign API URL and API Key, found under Settings, then Developer, then API Access
- Enough no2bounce credits to cover the batch, charged at one credit per record
Step-by-Step Integration Process
Each step below pairs with a screenshot from the product. Image placement follows the same pattern as the Klaviyo page: instruction paragraph, then screenshot, then bold figure caption.
Step 1: Open the Integrations dashboard
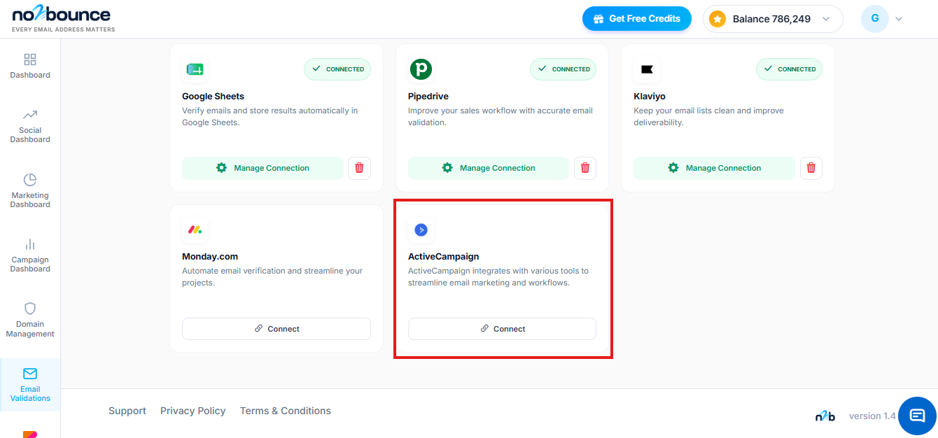
Sign in to no2bounce and open Email Validations from the left-hand navigation, then select Integrations. This screen lists every supported CRM and marketing platform, including Google Sheets, Pipedrive, Klaviyo, Salesforce, Zoho, HubSpot, and ActiveCampaign. Find the ActiveCampaign card and click Connect.
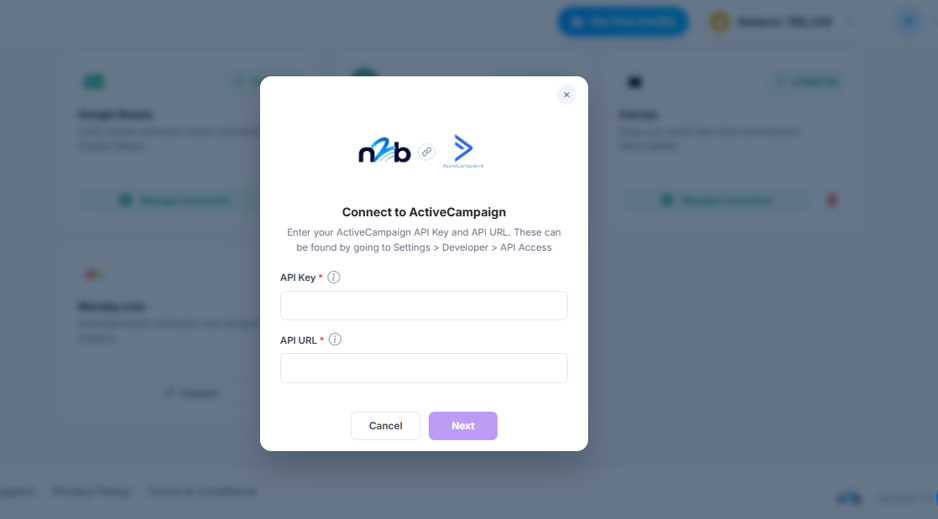
Step 2: Enter your ActiveCampaign API credentials
The Connect to ActiveCampaign window asks for two values: your API Key and your API URL. Both are found inside ActiveCampaign under Settings, then Developer, then API Access. Copy each value across exactly as shown, with no trailing spaces, and submit the form to authenticate. There is no OAuth redirect in this flow, so the connection is established as soon as the credentials are accepted.
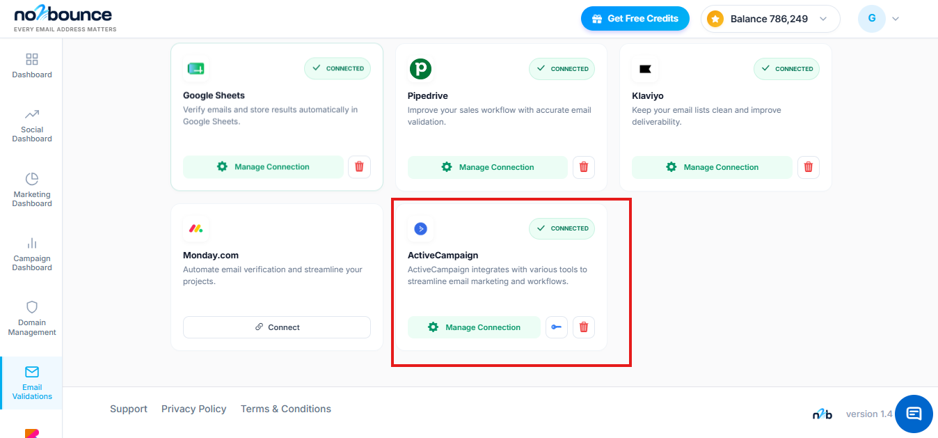
Step 3: Confirm the connection
Once the credentials are validated, the ActiveCampaign card returns to the Integrations dashboard with a green Connected badge. This confirms no2bounce can reach your ActiveCampaign account and is ready to pull contacts.
Step 4: Review or update stored credentials
Reopening the ActiveCampaign window at any point displays the stored API Key and API URL, along with Disconnect and Next options. Use this screen to swap in a new key if your credentials are rotated, or to disconnect the account entirely. Click Next to continue to field selection.
.png)
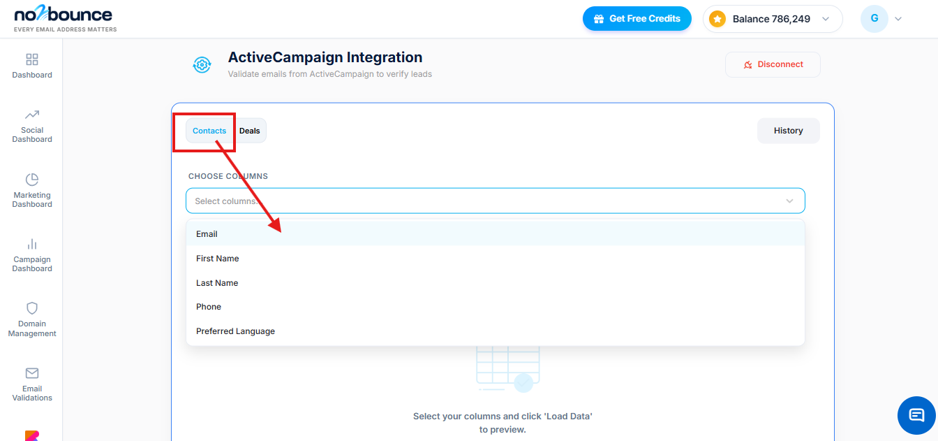
Step 5: Choose which contact fields to import
The ActiveCampaign Integration page opens on the Contacts tab. Use the field selector to choose which contact properties to bring into no2bounce. Available fields include Email, First Name, Last Name, Phone, and Preferred Language. Email is required, since it is the field being validated. Everything else is optional and exists purely to help you recognise records in the results.
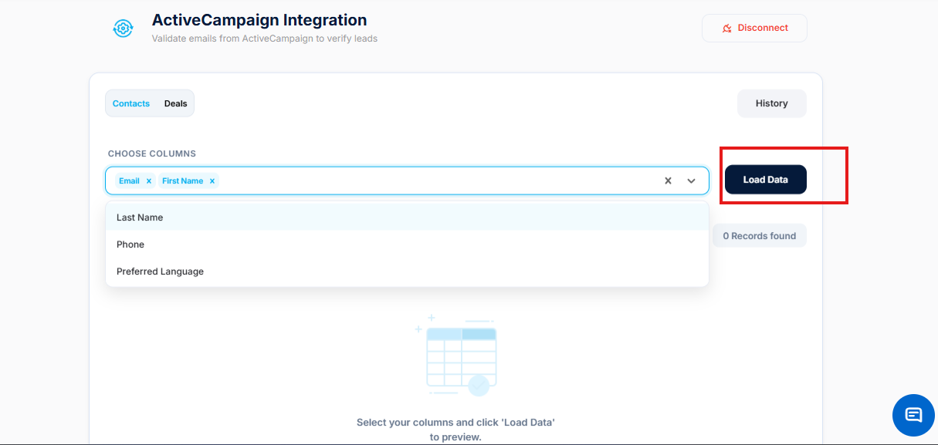
Step 6: Confirm the selected columns
Your chosen fields appear as active columns above the table, and no2bounce reports how many matching contact records were found in ActiveCampaign. Check the record count against what you expect before continuing, then load the data.
Step 7: Load and preview your data
The preview table lists the ActiveCampaign contacts pulled in for validation, showing each record alongside the fields you selected. A search filter sits above the table so you can locate specific records in larger imports. Review the preview and select the records you want to validate.
.png)
Step 8: Set your validation preferences
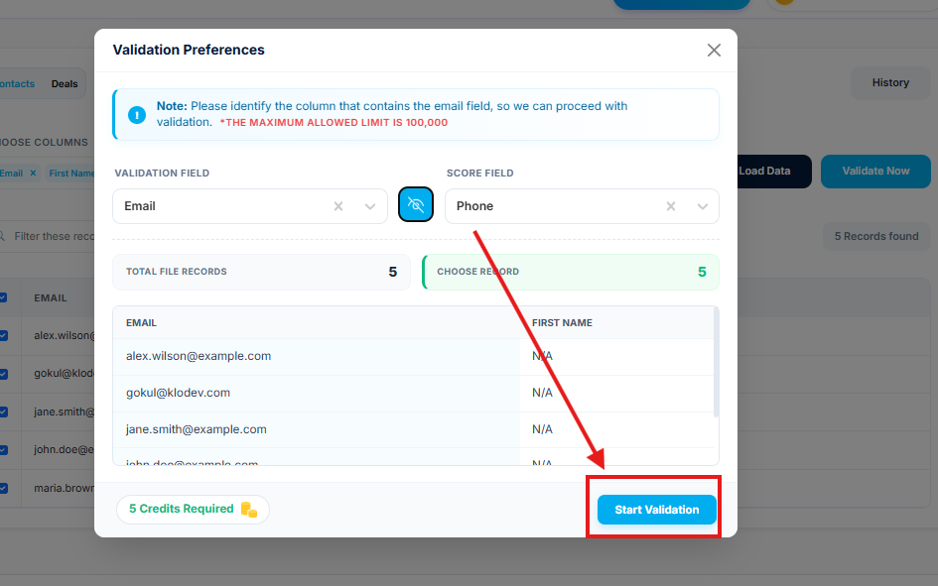
Clicking Validate Now opens the Validation Preferences dialog. Set the Validation Field to the column holding the email address, and optionally set a Score Field for reference. The dialog confirms your total record count and the credits the run will consume, charged at one credit per record. A single run supports up to 100,000 records. Review the figures, then click Start Validation.